
Seeing the rain outside, the cat decides against going outside. The man, having just opened the door for the cat, looks exasperated.
reference video:
Its hard to see in the small video below but I like the man's expressions and the way the cat sits down and looks up at the man.
I've retained a very useful piece of information about blinking from somewhere, So important I don't even remember where I learned it originally but it's been very useful. I recently had a top up in this article, but not before I was subconsciously following the advice while animating.
The most useful use of a blink is to show a characters thinking process. When they have an idea, switch from one emotion to another or when they realise something, a person will always blink.
Blinks in random places can look unnatural, people blink for a reason.
Rapid blinks make the character feel shy, uncomfortable, nervous, relieved or like they're just about to cry. No blinks at all give your character an angry or intense feel or can make them look dead.
I like how you can almost see the thought process of the cat, he looks at the rain then blinks (when he changes his mind about going outside), then sits down. Equally the man blinks when his emotion changes from apathetic to annoyed.
It has been said that 90% of acting is in the eyes, I think that's very true.
Friday, 14 May 2010

Wednesday, 12 May 2010
Kitty wants out
I've started animating, starting with the hardest scenes, though the first couple of scenes are some of the hardest. I took reference videos a couple of days ago for the man's movement. Getting reference videos for the cat was harder, as animals tend to be less cooperative than boyfriends, but I found just observing my own cat has helped.
I think the cat could jump up a little faster, and his tail twitches when it's not supposed to. The man's movement also needs a lot of work, as i was focusing more on the cat to start with. The timing is ok, he just looks a bit robotic as his hips don't move much yet. I think the cat should also move away from the door faster, as at the current rate he's due to get hit by it.
I think the cat could jump up a little faster, and his tail twitches when it's not supposed to. The man's movement also needs a lot of work, as i was focusing more on the cat to start with. The timing is ok, he just looks a bit robotic as his hips don't move much yet. I think the cat should also move away from the door faster, as at the current rate he's due to get hit by it.
Wednesday, 5 May 2010
More Scenery and Render Tests
For my work experience with the Sikh Channel I experimented with creating water for use in a small stream. I went over the different settings available from simulating the flow of water to creating ripples and wakes to vast oceans and small ponds. Maya has settings for ocean and ponds, the pond is a small body of water suitable for swimming pools, ponds and the like. Ocean stretches out to the horizon with regular adjustable waves.
It was clear that Maya's Ocean was ideal for my use. When I tried it, the default settings on their own needed only small colour adjustments to create the effect that I wanted above water...

It was just underwater that was the problem, the water surface looked good, but there was no sense of depth to the environment. Normally when things are far away underwater, they appear slightly faded as they are obscured by dissolved material.

In typical underwater scenes, the distance fades into a mass of blue.


I added a cube fog to try and replicate the effect.

It's looking better but it still needs some underwater caustics (like you see on the dolphins above) where light shines through rippling waves. At the moment the house looks a bit like its floating in space, the caustics should highlight the ground and make it look more like a sea bed.
I mapped a sequence of caustic images onto the sunlight directional light to give me the effect I was after.

Unfortunately the caustics also appear above water on the house so I had to break the light links on the house's geometry and add a separate directional light for the house.

I'm pretty happy with this result.
I wanted to see if I could recreate light rays passing through the water like this:

So I added a spotlight with a light fog mapped with the caustic texture to recreate rays passing through the water. Its a nice effect but I think its more suitable for deeper water.

Final underwater effect

As seen from the window

It was clear that Maya's Ocean was ideal for my use. When I tried it, the default settings on their own needed only small colour adjustments to create the effect that I wanted above water...

It was just underwater that was the problem, the water surface looked good, but there was no sense of depth to the environment. Normally when things are far away underwater, they appear slightly faded as they are obscured by dissolved material.

In typical underwater scenes, the distance fades into a mass of blue.


I added a cube fog to try and replicate the effect.

It's looking better but it still needs some underwater caustics (like you see on the dolphins above) where light shines through rippling waves. At the moment the house looks a bit like its floating in space, the caustics should highlight the ground and make it look more like a sea bed.
I mapped a sequence of caustic images onto the sunlight directional light to give me the effect I was after.

Unfortunately the caustics also appear above water on the house so I had to break the light links on the house's geometry and add a separate directional light for the house.

I'm pretty happy with this result.
I wanted to see if I could recreate light rays passing through the water like this:

So I added a spotlight with a light fog mapped with the caustic texture to recreate rays passing through the water. Its a nice effect but I think its more suitable for deeper water.

Final underwater effect

As seen from the window

Saturday, 1 May 2010
Scenery and L5 Contribution
I wanted the house to be 2 storey, an upstairs bedroom would have more of an impact if the waterline ends up under the window. I wasn't sure how realistic I wanded the house to be and what sort of shape. I did a quick test on a tall cartoony building.

Even though the height of the rooms is in proportion, it makes the house look too tall. I began to look into roof dormers to bring the needed height down a little.
Something like the house in family guy, but not quite as big.

Or like the house in UP but not quite as old.

This is my result, the textured version.

I created a simple scene file for the first couple of scenes where the owner chucks the cat out into the rain. For the sky I just mapped a sphere with a stock image of a 360 degree cloudy sky. For the rain I used paint effects for a simple 3D rain effect. I could add rain in after effects later on but I think this rain looks fine for my purposes.

I decided to make the top windows a little wider

I rigged the curtains with a blendshape so that they would appear to open just by moving a controller. I had experimented with maya's nCloth for this but it made the scene far too heavy.
Curtains test
Modelling the bed with a box modelling technique and beveling the edges.
The curved head board of the bed was made bt extruding a face along a curve and mirroring it to the other side.


For the bed cover I used Maya's nCloth to simulate draping material but then frose it in place so its just a polygon mesh.

Will from the L5 class moddled this bedside table setup for me.

I put textures on the objects to match the bed. The picture frame holds a picture of the cat in a sitting pose.

Another L5 moddled a lamp for me too, but I found it too high poly to use in my scene.


Even though the height of the rooms is in proportion, it makes the house look too tall. I began to look into roof dormers to bring the needed height down a little.
Something like the house in family guy, but not quite as big.

Or like the house in UP but not quite as old.

This is my result, the textured version.

I created a simple scene file for the first couple of scenes where the owner chucks the cat out into the rain. For the sky I just mapped a sphere with a stock image of a 360 degree cloudy sky. For the rain I used paint effects for a simple 3D rain effect. I could add rain in after effects later on but I think this rain looks fine for my purposes.

I decided to make the top windows a little wider

I rigged the curtains with a blendshape so that they would appear to open just by moving a controller. I had experimented with maya's nCloth for this but it made the scene far too heavy.
Curtains test
Modelling the bed with a box modelling technique and beveling the edges.
The curved head board of the bed was made bt extruding a face along a curve and mirroring it to the other side.


For the bed cover I used Maya's nCloth to simulate draping material but then frose it in place so its just a polygon mesh.

Will from the L5 class moddled this bedside table setup for me.

I put textures on the objects to match the bed. The picture frame holds a picture of the cat in a sitting pose.

Another L5 moddled a lamp for me too, but I found it too high poly to use in my scene.

Saturday, 24 April 2010
Fishy
The fish body started off as a lofted surface, converted to polygons.

I then split and extruded faces to make the fins, tail and eye socket.

The texture reference is this fish.


I added a sine deformer and a nurbs controller.

I attatched the controls of the sine deformer to new attributes on the controller, making sure to give 'offset' an unlimited maximum value so the fish can keep swimming.
To animate, I attatched the controller to a motion path and set keys for the sine offset at the start and end, careful not to key anything else.

I'm very happy with the result, the fish movement is realistic. The rig makes animating the fish along any path a lot easier.
Rendered fish

I then split and extruded faces to make the fins, tail and eye socket.

The texture reference is this fish.


I added a sine deformer and a nurbs controller.

I attatched the controls of the sine deformer to new attributes on the controller, making sure to give 'offset' an unlimited maximum value so the fish can keep swimming.
To animate, I attatched the controller to a motion path and set keys for the sine offset at the start and end, careful not to key anything else.

I'm very happy with the result, the fish movement is realistic. The rig makes animating the fish along any path a lot easier.
Rendered fish
Friday, 23 April 2010
Rigging- Man
For the man, there were settings to automatically create a bipedal character without the need to add separate parts, it was just a matter of scaling and positioning it to my character.

Finished rig, the only weight painting I had to do for this one was for the bathrobe, to make it move with the legs.

With the face rig widget it was similar, just a matter of positioning curves instead of objects.

The rig worked in all areas apart from the eye, it was just a matter of the weights being where they shouldn't be.

Painting out the weights fixed the problem.

Finished face rig

With the hair I applied a slight jiggle deformer to the ends so that they would shake a little when the man moves his head quickly.
Quick face test

Finished rig, the only weight painting I had to do for this one was for the bathrobe, to make it move with the legs.

With the face rig widget it was similar, just a matter of positioning curves instead of objects.

The rig worked in all areas apart from the eye, it was just a matter of the weights being where they shouldn't be.
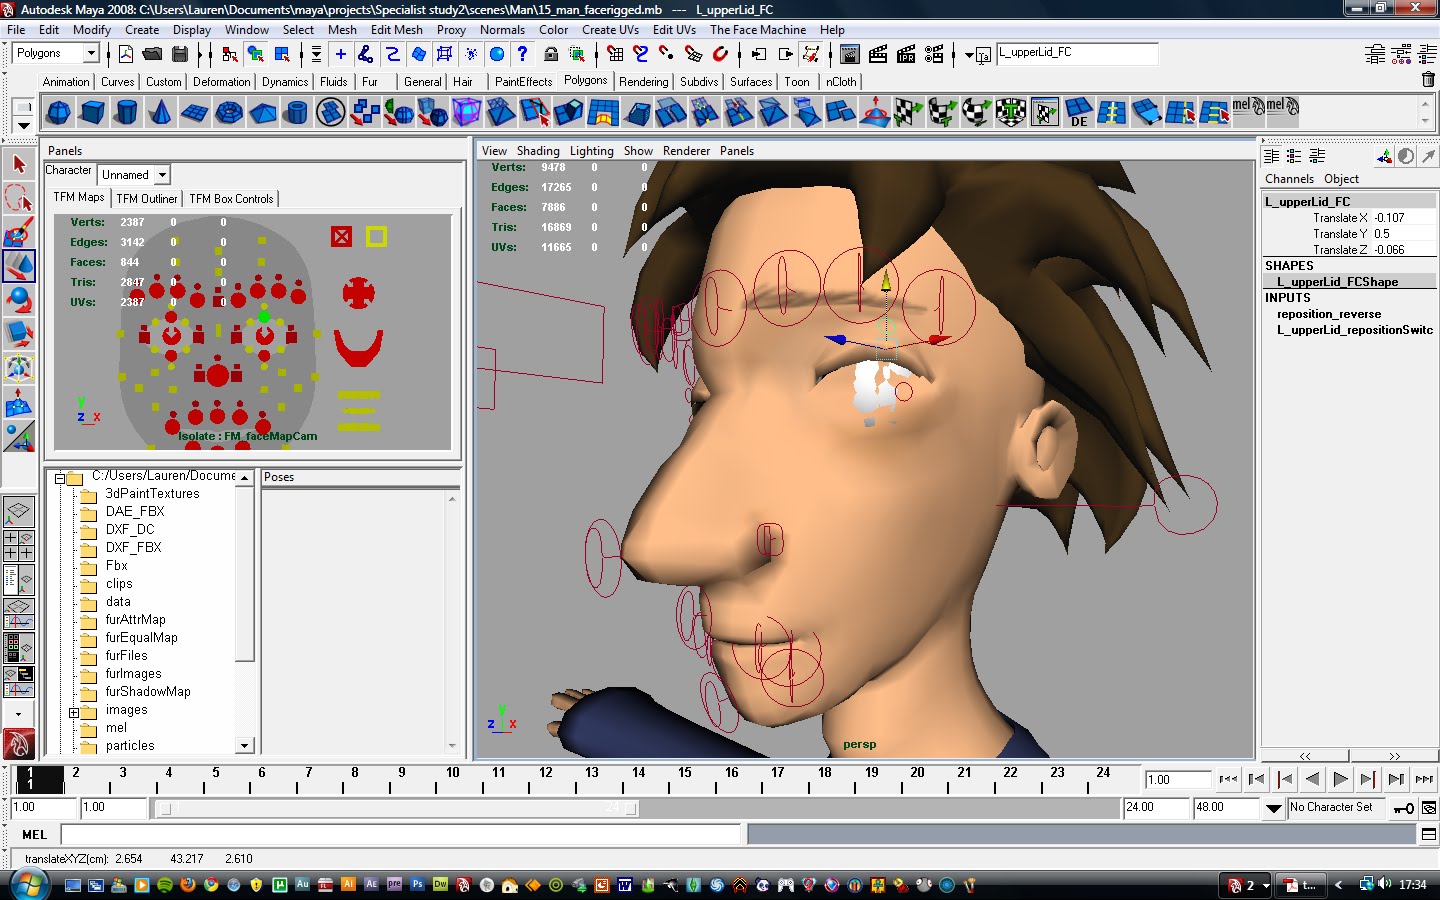
Painting out the weights fixed the problem.

Finished face rig

With the hair I applied a slight jiggle deformer to the ends so that they would shake a little when the man moves his head quickly.
Quick face test
Tuesday, 20 April 2010
Rigging- Cat
I followed the manual that came with the Setup machine to rig the cat. Each body section (colour coded) was added one by one, the front legs as one and the back legs as another. When first added, the proportions, rotations and shapes were set to match a humanoid character but it didn't take long to match them to my cat character.

Once the parts are set up to match your character you can rig it in a couple of clicks.

For the eyes I followed this tutorial, the eyeballs are connected to the controller with aim constraints and the eyelids to the eyelid controllers also with aim constraints.

For the mouth I added an extra joint, added the influence to the mesh, parented the joint to the head and painted the weights so that only the bottom part of the mouth is influenced when the jaw is opened.

Some of the weights needed altering on the belly and the legs.


I decided I needed a few more edge loops around the stomach, after adding them and altering the weights, the deformation of the stomach is much better.


I added joints inside the ears and connected them the same way I connected the jaw. I then just displayed the selection handles so that the joints could be easily selected and rotated.

When testing the rig I found that the eyelids played up when rotating the head, I realised that it had something to do with the constraints I'd put on them. Though I'd followed the tutorial, the setup was obviously unsuitable if i couldn't have my cat blink wile his head is rotated.
I fixed the problem by creating driven keys, with the controllers as the drivers (y axis) and the eyelid rotate (x axis) as the driven. The result is much better.

Once the parts are set up to match your character you can rig it in a couple of clicks.

For the eyes I followed this tutorial, the eyeballs are connected to the controller with aim constraints and the eyelids to the eyelid controllers also with aim constraints.

For the mouth I added an extra joint, added the influence to the mesh, parented the joint to the head and painted the weights so that only the bottom part of the mouth is influenced when the jaw is opened.

Some of the weights needed altering on the belly and the legs.


I decided I needed a few more edge loops around the stomach, after adding them and altering the weights, the deformation of the stomach is much better.

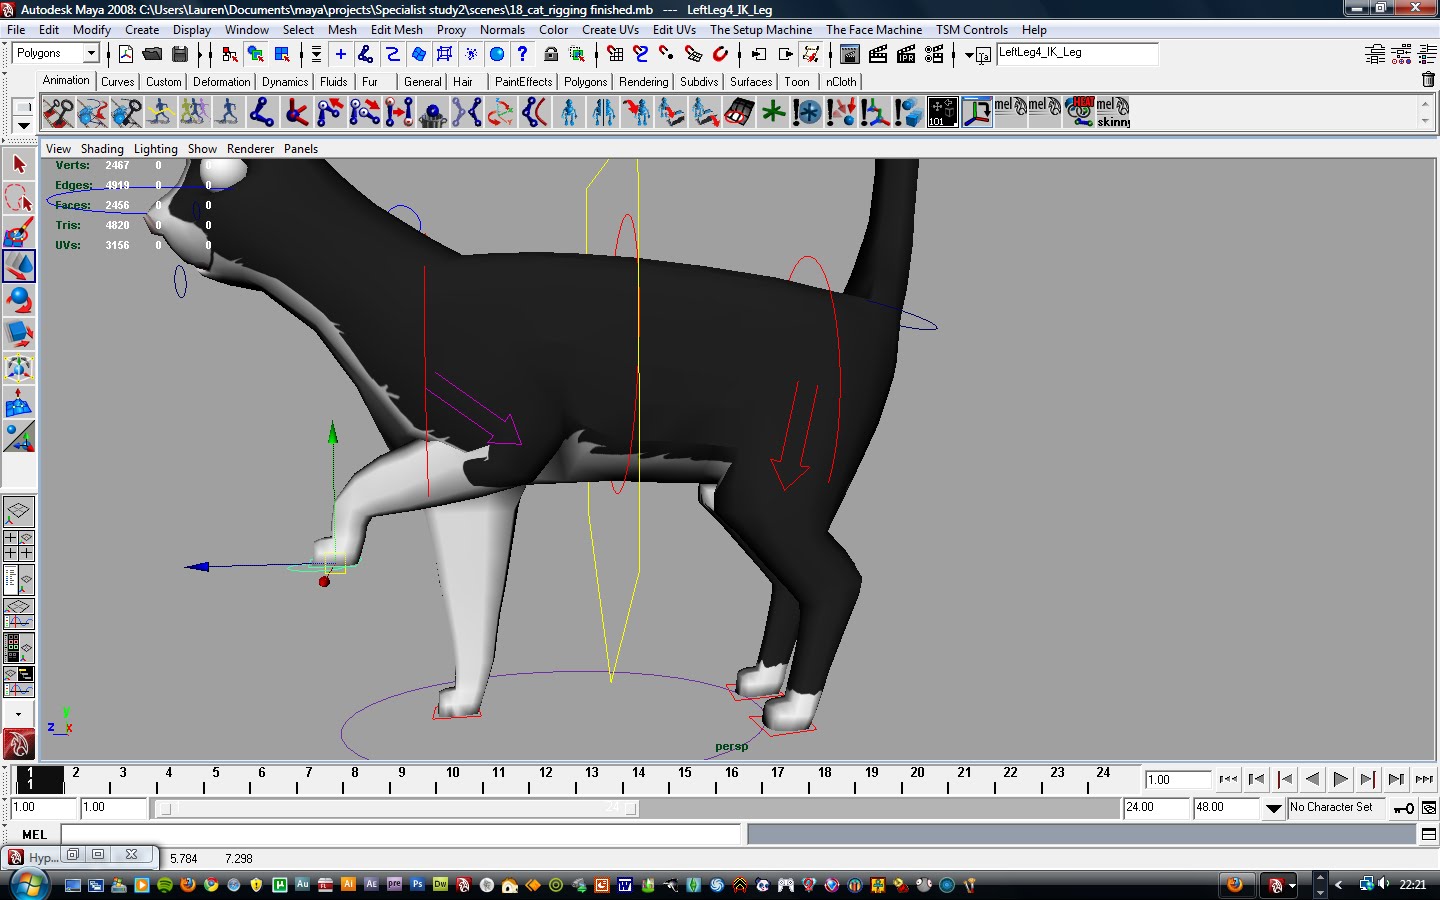
I added joints inside the ears and connected them the same way I connected the jaw. I then just displayed the selection handles so that the joints could be easily selected and rotated.

When testing the rig I found that the eyelids played up when rotating the head, I realised that it had something to do with the constraints I'd put on them. Though I'd followed the tutorial, the setup was obviously unsuitable if i couldn't have my cat blink wile his head is rotated.
I fixed the problem by creating driven keys, with the controllers as the drivers (y axis) and the eyelid rotate (x axis) as the driven. The result is much better.
Subscribe to:
Posts (Atom)