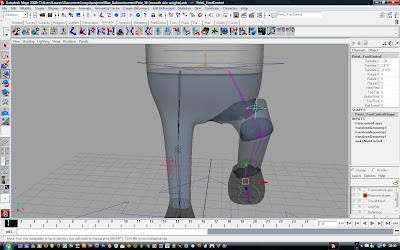
Its better now though than what it was. It seemed as though I was working at a two steps forward one step back pace. I painted the skin weights for Pete all over then had problems with the hips so I had to unbind the skin and reposition the joints to move the hips further down in the character. I also wanted to add a jaw to Pete's face to make blend shapes easier.

Even with the rough skinning you can see the problem between the legs. The hips too high up, giving odd deformation.
The problem with the paint skin weights tool is that if you use anything other than 'add' for your brush, you can't control where your influences are going. To be able to smooth influences and blend one joint to another, you have to 'hold' all the joints but the ones you're working on, otherwise you'll find Maya will add and remove influences from any random joint it feels like.
With the regular paint skin weights tool, there is no way to hold/un-hold all joints with one click so you have to click on each joint individually (and when your model has many many bones, this can be very time consuming).
To save on production time and make my life a little easier, I'm gradually customising Maya to meet my needs and improve my work flow. I looked for scripts that could improve on the skinning process. I found two that were very useful and added them to the animation shelf:
Heat-Weight
This script improves on the default skin weights that Maya assigns. It excludes all end joints (as most of the time they do not need weights to them), influences are better placed in relation to the joints and boundaries are automatically smoothed. It is not an entirely automatic script as there is still a good deal of tweaking to be done afterwards but it gives you weights that are a far better starting point.
Skinny
Skinny is an improvement on the paint skin weights tool where you can lock/ unlock multiple joints with just one click to hold their values while you work on other joints.
I also found a useful video about improving work flow when painting skin weights. A process of 'over-weighting' influences will prevent you from having to paint a joints influence more than once.
Finding and using these tools and methods took a good deal of trial and error and time, but now that I've found them and know how they work, it will vastly improve my work flow and overall production time on future projects. Also, if it can help others, that's a big bonus too :)

No comments:
Post a Comment